Crochet T-Shirt Yarn Clutch Pattern: A Free Waistcoat-Stitch Clutch Built Around a 22 cm Snap Frame
Crochet a small rectangle in rounds, build straight sides in waistcoat stitch, then work the last round over the two bars of a 22 cm clic-clac frame. At 8 stitches to 10 cm on a 12 mm hook, that is 36 stitches round the bag, about 115 to 180 m of bobbin-type T-shirt yarn, and a clutch about 22 cm wide and 15 cm tall (8⅝ × 6 in). The frame decides the size of the opening, so buy it first and measure it before you chain.
Download the free printable PDF: the whole pattern with a picture for every step, the materials and the size table, ready to print. No sign-up.
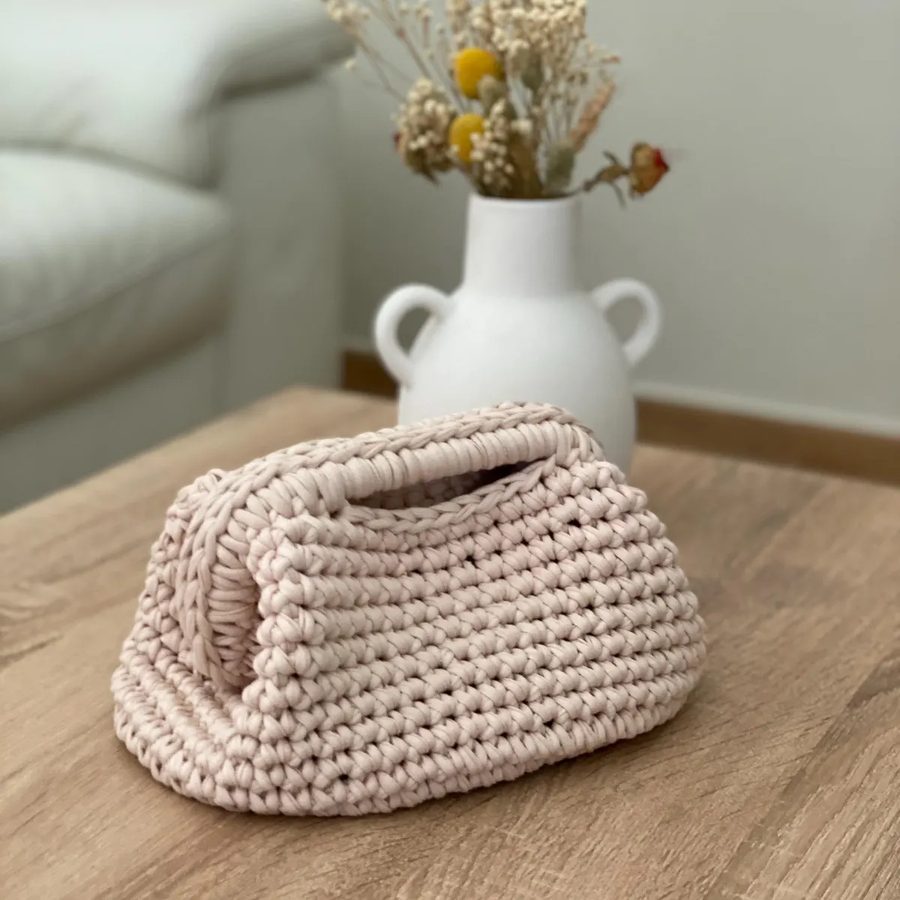
The clutch at a glance
| What | This clutch |
|---|---|
| Finished size | About 22 cm wide at the frame, 15 cm tall, 5 cm deep at the base (8⅝ × 6 × 2 in) |
| Frame | One metal clic-clac (snap) purse frame, 22 cm long |
| Yarn | Bobbin-type T-shirt yarn, about 115 to 180 m (126 to 197 yd) |
| Hook | 12 mm, or the size that gives the gauge |
| Gauge | 8 stitches and 8 rounds to 10 cm (4 in) in waistcoat stitch, worked in the round |
| Construction | Rectangular base worked in rounds around a chain, a back-loop fold round, straight sides in spiral rounds, top round crocheted over the frame |
| Skill level | Confident beginner. You should already work single crochet in the round and count your stitches. Waistcoat stitch and fitting the frame are the two harder parts |
Why the frame comes first
A clic-clac frame is a pair of metal bars hinged together at both ends, with a spring that snaps the mouth open and clicks it shut. The top edge of the bag wraps round both bars, once along the front and once along the back, so the frame fixes how long that edge must be: about twice the frame’s length. Every other number in the pattern follows from that.
These frames are sold in a short list of lengths. Two crochet-bag suppliers’ listings checked for this pattern run from 13 to 29 cm between them: 13, 16, 19, 22, 24, 26 and 29 cm. The clutch patterns surveyed for this page finish between 21 and 33 cm wide, and inside that range 22 cm is the length both suppliers list in the most versions. That is why this clutch is built around 22 cm.
Some frames have straight bars, some gently arched, and some a wave along the top. Straight and gently arched bars both suit this pattern, because you measure along the bar. A pronounced wave, or a frame with a handle fixed to it, is not covered here.
What you need
The product links in this list are affiliate links. As an Amazon Associate I earn from qualifying purchases, at no extra cost to you.
- Bobbin-type T-shirt yarn, about 115 to 180 m (126 to 197 yd). This is the heavy kind sold on large cones, such as Hoooked Zpagetti, which gives roughly 14 to 22 m per 100 g. A cone of that yarn holds about 120 m (131 yd), so have a second cone from the same batch. By label hook size and gauge it sits mostly in the super bulky (6) row of the yarn weight chart.
- A 12 mm hook. The hook size chart lists no US letter for 12 mm, so go by millimetres. Keep the sizes either side to hand in case your swatch is off. A pointed head helps the hook into waistcoat stitches. One option: a 12 mm metal hook.
- One metal clic-clac (snap) purse frame, 22 cm long, with straight or gently arched bars. Snap it open and shut a few times before you start.
- 5 locking stitch markers, such as Clover locking markers.
- A length of smooth scrap yarn in a contrast colour, for tying the frame in place.
- A large-eye blunt needle that takes T-shirt yarn, or use the hook to weave in ends.
- Scissors and a tape measure.
- Optional, for a lining: cotton fabric, a sewing needle and thread.
Gauge and abbreviations
Gauge: 8 stitches and 8 rounds to 10 cm (4 in) in waistcoat stitch, worked in the round, on a 12 mm hook. That figure comes from the published gauges for waistcoat-stitch bags in T-shirt yarn, not from a swatch made for this page. One free waistcoat-stitch bag in this yarn type, on a 12 mm hook, gives 2 stitches and 2 rounds to the inch. A second, in a different T-shirt yarn on a 7 mm hook and a pattern stitch that includes waistcoat stitch, gives 8 stitches and 9 rows to 10 cm. Two sources are not a norm, so your swatch matters more than this number.
Gauge varies by brand, and by cone within a brand. Sellers give the width of one well-known T-shirt yarn as anywhere from 1 to 2.5 cm, and hook advice for that same yarn runs from 8 to 15 mm depending on the listing. Treat the label as a starting point only.
Swatch in the round, because waistcoat stitch is hard to read in rows. Chain 20 and join into a ring without twisting it. Work 1 round of ordinary single crochet, then waistcoat stitch in a spiral until the tube is about 12 cm tall. Flatten it, then count the stitches across 10 cm of one layer and the rounds in 10 cm of height. Unravel it afterwards and reuse the yarn.
If your swatch gives 7 or 9 stitches instead of 8, keep your hook and use the counts for your gauge in the next section. If it gives fewer than 7 or more than 9, change hook size and swatch again.
Abbreviations (US terms)
- ch: chain
- sc: single crochet
- sl st: slip stitch
- BLO: back loop only
- st(s): stitch(es)
Waistcoat stitch. It is a single crochet with the hook in a different place. Every finished single crochet shows a V on its front, formed by its two legs. Instead of slipping the hook under the two loops along the top, push it from front to back through the middle of that V, between the legs. Then yarn over, draw up a loop, yarn over again and pull through both loops. A round of ordinary single crochet has to exist before there is any V to work into, which is why the first round of the base is plain single crochet. Other names for it are centre single crochet, knit stitch and split single crochet.
It pulls tight. Every source consulted for this pattern warns that the hook struggles to get into the V. Leave the loop on your hook a little loose before you finish each stitch, and keep the first waistcoat round especially relaxed. Aim for even tension rather than tight tension, because uneven stitches show clearly in this fabric and can make it lean. If it is still a fight, go up one hook size, swatch again and use the counts for your new gauge.
Work out your numbers
Two measurements decide everything: your frame and your gauge.
Measure the frame. Close it and run a tape measure along one bar from end to end, following any curve. Call this F. For the frame this pattern was designed around, F is 22 cm. Listings give one size without saying what it measures, so measure your own.
Find the stitches round the bag. The top edge runs along both bars, so it needs 2 × F of fabric. Multiply that by your stitches per centimetre and round up to the next even number. Round up because the stitch at each end of each bar is not on the bar, and the hinge needs that slack to fold.
| Your gauge (stitches per 10 cm) | Stitches round the bag | Foundation chain | Base after 2 rounds | Stitches over each bar |
|---|---|---|---|---|
| 7 | 32 | 13 | about 20 × 5.7 cm | 14 |
| 8 (pattern gauge) | 36 | 15 | about 20 × 5 cm | 16 |
| 9 | 40 | 17 | about 20 × 4.4 cm | 18 |
These rows are for a 22 cm frame. For any other frame: stitches round = 2 × F × your stitches per cm, rounded up to an even number, and foundation chain = (stitches round ÷ 2) − 3.
The steps below use the 8-stitch row. On another row, use its numbers wherever a step gives a count. The measurements stay the same.
The pattern
The pattern is written to measurements, with each count worked out from gauge, so it can follow your yarn. It has not yet been test-made from this page.
Three things could not be settled without a test make: whether the base corners lie flat, whether the stitches sit evenly along the bars, and how much slack each hinge needs to fold. The steps say what to check at each of those points.
Work in a continuous spiral: do not join rounds with a slip stitch. Keep a marker in the first stitch of each round and move it up as you go. Keep the same side facing you throughout, because that side becomes the outside of the clutch and carries the V pattern. Measure everything flat and unstretched.
Base
- Check the frame. Snap it open and shut. Measure F as described above. If it is not 22 cm, work out your own counts before you chain.
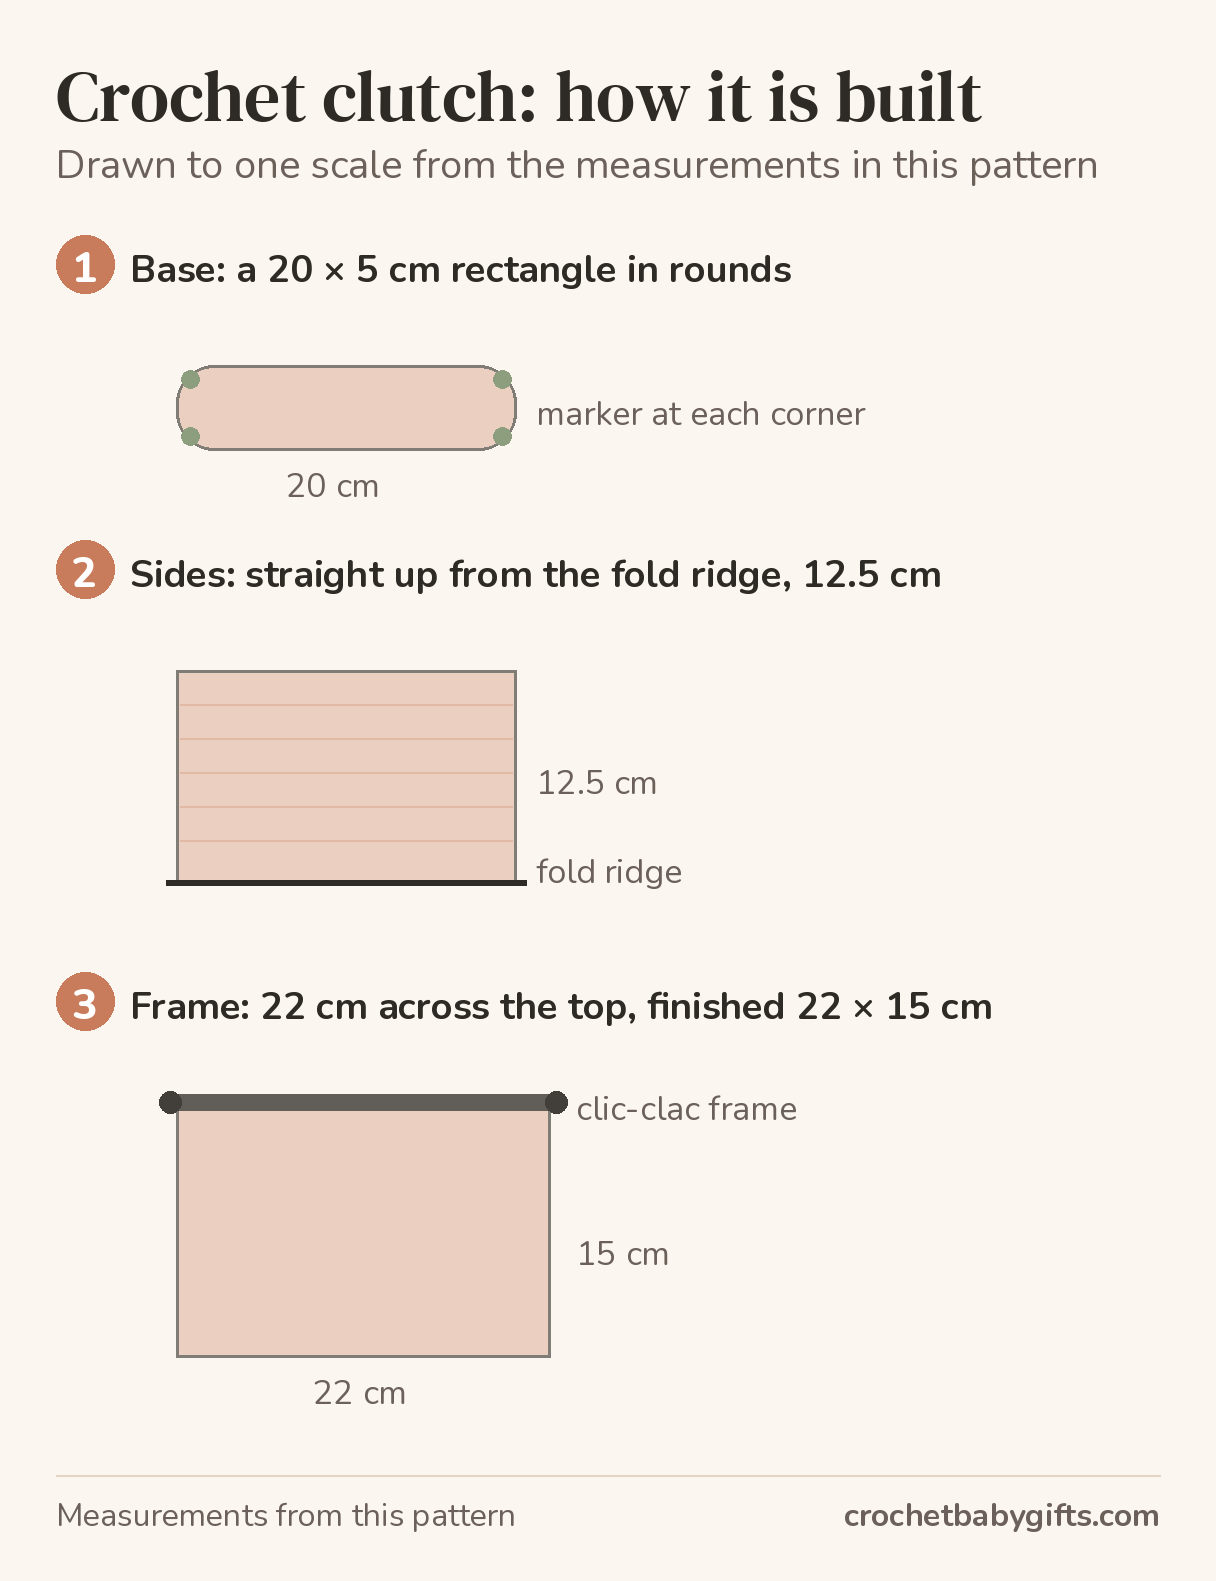
- Foundation chain. Chain 15 loosely, leaving a tail.
- Round 1, ordinary single crochet. Sc in the 2nd ch from the hook and in each ch across (14 sc). Work 1 more sc into that same last chain. Turn the chain so its underside faces up and, working into the free loops along that side, sc in each ch back to the start, ending in the chain that holds the first sc (13 sc). Do not join. [28 sts] Work over the starting tail as you go to hide it. Place a marker in the 1st, 14th, 15th and 28th stitches. These are the four corners, two at each end of the chain. The marker in the 1st stitch also marks the start of the round.
- Round 2, waistcoat stitch with corners. In each marked corner stitch, work 3 ordinary sc under both top loops, because three stitches will not fit through one V. In every other stitch, work 1 waistcoat stitch. That is 3 sc, 12 waistcoat, 3 sc, 3 sc, 12 waistcoat, 3 sc. [36 sts] Take out the corner markers and put the start marker in the first sc of this round.
- Check the base. Lay it flat and count. It should have 36 stitches and measure about 20 × 5 cm (7⅞ × 2 in). A wrong count shows later as a lopsided clutch, so fix it now. Check that the corners lie flat. This is the first untested point: if they cup up or ripple, see the troubleshooting section before going on.
Sides
- Round 3, the fold round. Sc in the back loop only of each stitch. [36 sts] The unworked front loops leave a ridge round the outside where the base turns up, which keeps the base flat and helps the sides stand.
- Rounds 4 onwards, waistcoat stitch. Work 1 waistcoat stitch in each stitch. [36 sts] Keep going until the sides measure 12.5 cm (4⅞ in) up from the ridge. At the pattern gauge that is about 10 rounds, but go by the tape measure, because the two published gauges disagree on how tall a round of this stitch is (8 or 9 rounds to 10 cm). Count your stitches every few rounds.
- Find the two folds. Flatten the tube so that one fold falls just before the stitch with the start marker. Count that stitch as stitch 1 of the front and count on to 18. The other fold should fall between stitches 18 and 19. Put a marker in stitch 19, the first stitch of the back. The base should sit centred under the front and the back, with its short ends tucked in at the folds. The flattened tube should measure about 22.5 cm (8⅞ in) across, a little more than the frame.
Frame
- Tie the frame on. Close the frame. Lay the front bar along the top edge of the front, the back bar along the back, with a hinge at each fold. Tie each bar to the edge with scrap yarn at its centre and near each end, six ties in all. Look at it closed: front and back should hold the same amount of fabric and the hinges should sit right at the folds. Adjust now, because the next step is hard to undo. Snap it open and shut once more.
- Frame round, front bar. Open the frame. With the outside facing you, hold the front bar along the top edge. Stitch 1, at the fold: 1 ordinary sc, not over the bar. Stitches 2 to 17: work each sc over the bar. To do that, put the hook into the stitch below the bar, yarn over and draw the loop back through to the front, then take the yarn over the top of the bar and pull through both loops, so the finished stitch closes round the bar. Stitch 18, at the other fold: 1 ordinary sc, not over the bar. [16 sts over the bar]
- Check, then the back bar. Close the frame. It should click shut with no yarn caught in either hinge. This is the second and third untested point: the stitches should sit evenly along the bar without bunching, and the plain stitch at each end should leave the hinge free to fold. Then open it and carry on round the back. Stitch 19: 1 ordinary sc, not over the bar. Stitches 20 to 35: over the back bar. Stitch 36: 1 ordinary sc, not over the bar. [16 sts over the bar, 36 sts in the round]
Finishing
- End the spiral. Sl st into the next stitch to smooth the step where the spiral ends. Fasten off, leaving a tail.
- Weave in the ends. T-shirt yarn is slippery, so take each end through several stitches on the inside, change direction at least once, and then trim.
- Free the frame. Cut away the scrap yarn ties. Snap the frame open and shut a few times. If it sticks, look for yarn caught in a hinge and ease it out with the tip of the hook.
- Lining, optional. Cut fabric to the inside shape, hem the top edge, and sew it to the inside just below the frame round with small stitches.
If something goes wrong
The hook will not go into the V. This is the most common complaint about waistcoat stitch. Loosen the loop on the hook before finishing each stitch, keep the first waistcoat round relaxed, and try a hook with a pointed head. If none of that works, go up a hook size, swatch again and use the counts for your new gauge.
The base corners cup up or ripple. Cupping means the corners hold too few stitches for your tension, rippling means too many. Do not change the number of corner stitches, because the total has to stay at 36 for the frame. Work round 2 again with looser corner stitches if it cups, or firmer ones if it ripples. Three ordinary single crochet at each corner is the part of this design a test make still has to confirm.
The sides flare out or pull in. Measure round the tube. It should be about 44 to 46 cm (17¼ to 18 in), close to twice the frame. Much larger and the stitches will crowd the bars; much smaller and the fabric will stretch to reach the hinges. Either way, your gauge in the sides has drifted from your swatch, so measure it again before the frame round.
The yarn changes width partway, or the cone has a knot. T-shirt yarn varies inside one cone, and some cones carry factory joins that can open later. Cut out any knot and join the two ends: either cut a small slit near each end and pull one strip through the other, or overlap the ends and sew them flat.
Small things slip out between the stitches. Waistcoat stitch wants loose loops so you can make it, while a bag wants firm tension so it has no gaps. If your clutch shows daylight, add the optional lining rather than tightening up, because a tighter waistcoat stitch is harder to work.
Metal shows between the stitches on a bar. Work the frame-round stitches a little closer together. If metal still shows, one published clutch pattern wraps each bar closely in yarn before attaching it, leaving the hinge ends bare so the frame still folds. Wrap with the same yarn, or a thinner one in the same colour if the wrap makes the bar too thick to stitch over.
The frame will not close. Look for yarn caught in a hinge first. If the end stitches are pulling the hinge, undo the plain stitch at that end and work it again more loosely.
Your hands ache. Big hooks with heavy yarn are hard on hands. Take breaks and keep your tension relaxed.
The same style in other colours
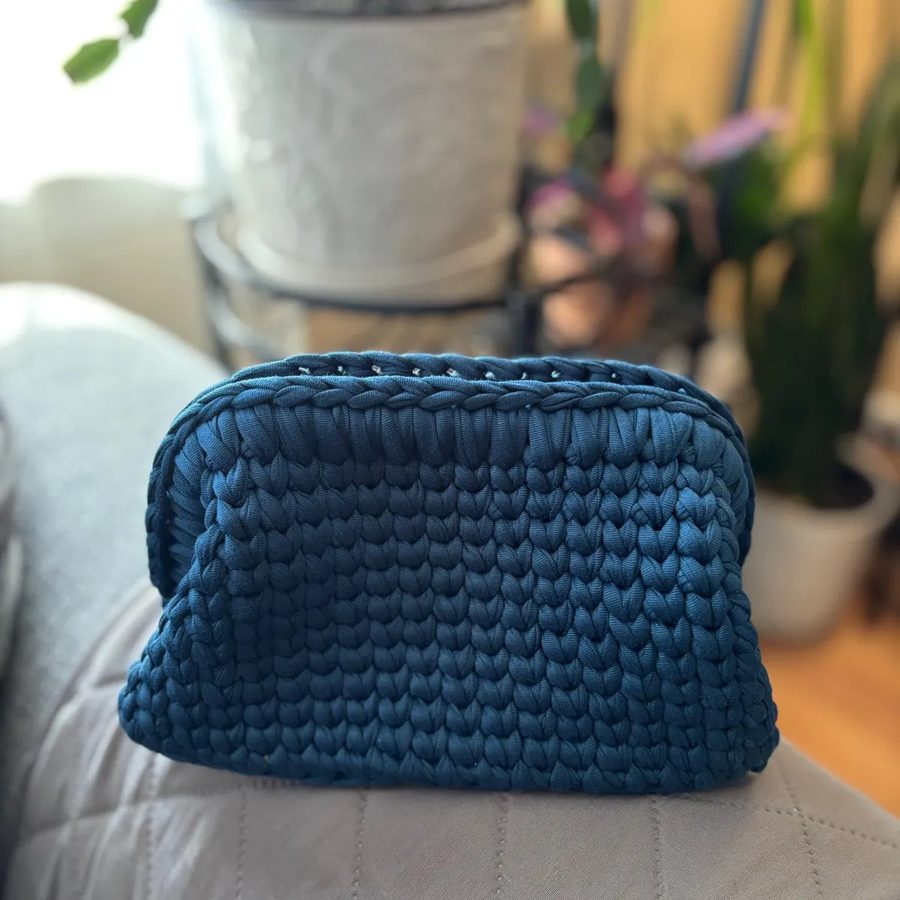
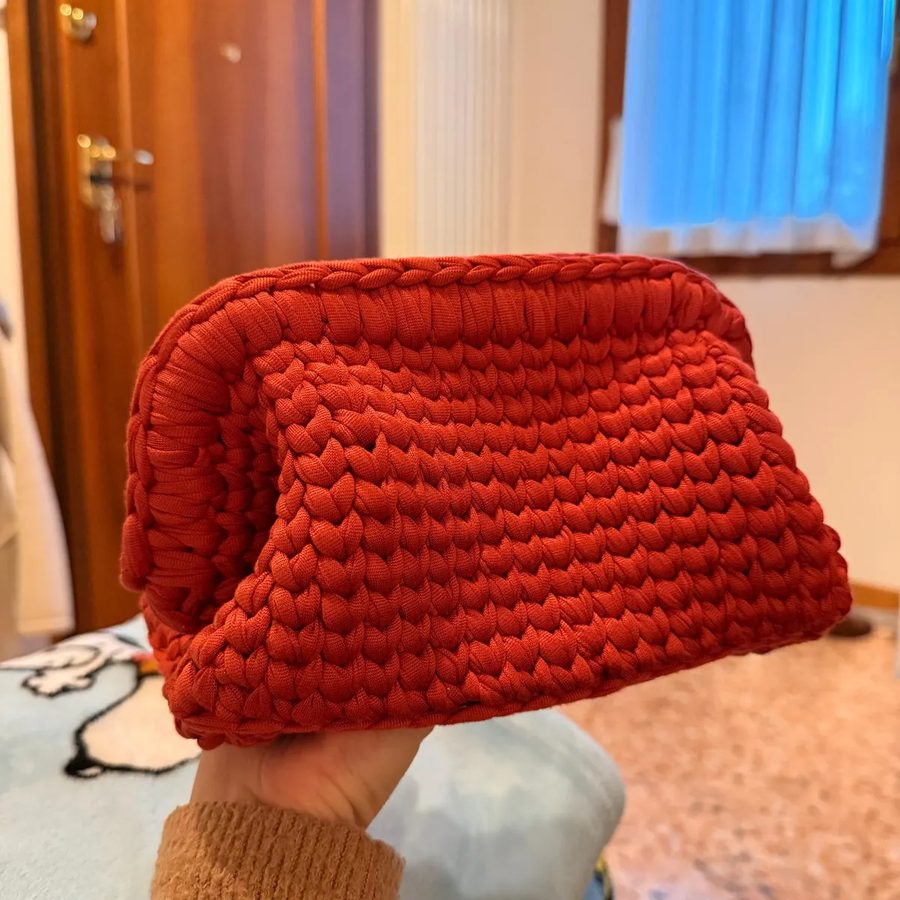
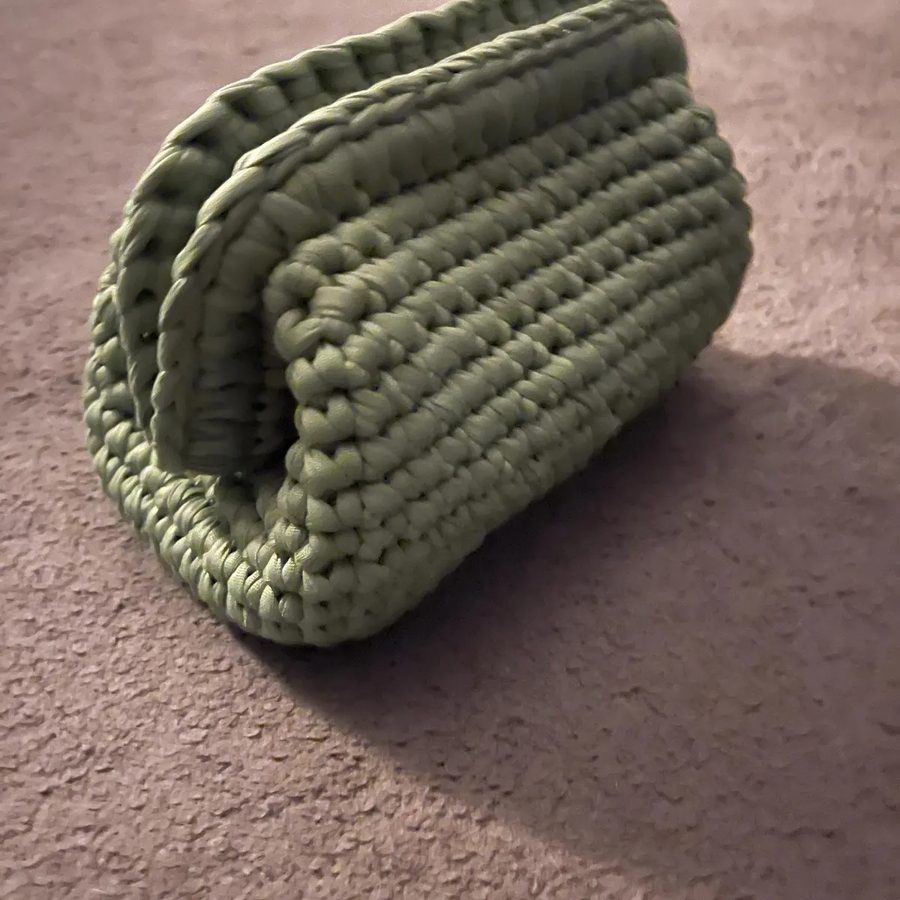
T-shirt yarn comes in strong solid colours, and the waistcoat-stitch texture reads well in all of them. These were made by the site owner while learning this style.
Frequently asked questions
Is this a good first crochet project? It suits a confident beginner rather than a first-timer. All of it is single crochet and one variation of it, but waistcoat stitch is tight work in this yarn, and fitting the frame needs patience and a careful count.
Can I use a frame that is not 22 cm? Yes, if you redo the numbers. Measure the bar, multiply twice its length by your stitches per centimetre and round up to an even number, then chain half that number minus 3. Over each bar you work half the total minus 2, with one plain stitch at each end. Keep the sides at 12.5 cm or change them to suit. Only the 22 cm version is worked through on this page.
Can I use ribbon yarn instead of bobbin T-shirt yarn? Ribbon or tube yarns give roughly three times the length per 100 g and are thinner, so your gauge will be different. Swatch in waistcoat stitch, use the table if you get 7 to 9 stitches to 10 cm, and the formula if you do not. The yarn amounts on this page are for the bobbin type only.
Does it need a lining? No. Waistcoat stitch is dense enough to hold the shape on its own. Small gaps between stitches show from the inside, though, so if you will carry coins or earrings in it, sew in a simple fabric lining after the frame is on.